Showing posts with label accessories. Show all posts

Monday, November 11, 2013

Tiny Nursery: Ready & Waiting

Once the main components of the nursery were in place, I was gradually able to organize and decorate the space.  I've used a combination of Craig's List purchases (the red chest of drawers), Ikea items (crib, shelves, curtain wire), hand-me-downs and neighborhood listserv finds (most of the clothes, a few toys), and quite a few things from my own childhood (crib quilt, many toys, odds and ends) to pull this little room together.


I hung a couple of my own paintings and moved my great grandmother's rocker into the room.


Closet full of little clothes.

The chest is stocked with diapers and covers (thank you, Modern Diaper Service early delivery!), socks and hats, bedding and blankets, with a changing area on top.

Some of my childhood toys, all well loved and well remembered.

 Other items I'm excited about:

Moses basket, found on the neighborhood listserv, for portable sleeping.

Beautiful receiving blanket knitted by Mr. MJ's mother.

Two paintings on paper by my friend Mike Dowley, to hang above the crib.  Need to get these framed!

There are still one or two things this little room lacks, like a lamp and a mobile, but they will arrive from Little Rock sooner or later.  For now, the nursery is ready and waiting for Baby MJ!

Thursday, November 7, 2013

Tiny Nursery: Potato Print Curtains!

The windows in the tiny nursery are tricky, since they are very tall and include both a window and a functioning door that leads onto the sleeping porches (and the new office-ette).  I determined that the best looking way to cover them would be to run a curtain along the whole wall.  But after weeks of Internet and in-person shopping, I hadn't found Exactly What I Was Looking For, and the time to hang them was nigh.  In a fit of pique (and energy!) I decided to make my own curtains from canvas drop cloths and paint.

I first bought two large canvas drop cloths, then washed and dried them in case they had any kind of sizing or other treatment on them.  I next carved some simple triangles into three potato halves, using regular kitchen knives and a couple of chisels.

Potato stamps!
I wanted a simple pattern that would be forgiving of mistakes and variations, and easy to cover a large surface with.  I decided to use the same paint for both curtains and wall to keep the scheme in the nursery streamlined and not too busy.

Potato stamps and Benjamin Moore Natura paint, to be used for both curtains and walls.

Before working on my drop cloths, I tested out some printing methods on scrap fabric.  I poured a small  amount of paint into a roller try, donned some rubber gloves, and experimented with brushing on the paint vs dipping directly into it.  I needed to figure out how much paint was sufficient to get a good print, and how much would just turn into a blob.


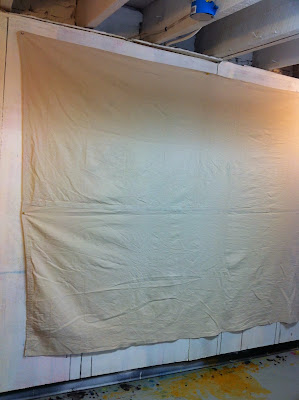
After figuring out a strategy, I stretched my first drop cloth onto one of the big painting walls in my studio.


And I started to print!


After several hours of work, I produced this thing of beauty:

One finished curtain
Each curtain took me about a day to fully print, including breaks to do other things and rest my hands.  I learned the hard way not to just leave my potatoes in the tray with my paint: rotting will occur, oozy grossness will ensue!  If you try this at home, and your project takes more than a day, wrap up your potatoes and stick them in the fridge!

Finished product, in place.  Those happy smiles are worth my couple hours of oozy grossness.


Monday, August 26, 2013

Bathroom Boogaloo: Done!

It's now a few weeks after our professionals finished up their portion of the bathroom.  After some hemming and hawing, and some Craig's List-ing too, we are now finished with our part.  So here's our new second bathroom, now with shelving, a mirror, towels, etc.  Come visit and check it for yourselves!

New mirror and shelves for toiletries, etc.

New shelves for laundry and cleaning supplies.

Happy bathing!

Thursday, January 19, 2012

Kitchen Conundrum: Hang Ups

Yesterday afternoon, after the replacement stove was delivered, I started in on some more finishing touches. We decided to hang some shelves and pot rails near the sink and stove to keep pots and soap and dishtowels handy. I knew I would need some major hardware to accomplish this task (along with some major drill skills -- one wall we wanted to hang on is brick under the plaster).

I decided to use the kind of anchors (self-drilling nylons ones) I uncovered when I took down the previous shelves.


Here's an in-progress shot. This is the brick wall -- super tough!


Here's the finished product: shelves for pots, hooks for skillets.


And more hooks directly opposite, behind the sink.


But here's the big news: tonight, we are cooking with gas!


Cross your fingers & toes for us; we aim to have this project wrapped up by the end of the weekend, just in time for Chinese New Year.

Wednesday, January 11, 2012

Kitchen Conundrum: Yesterday was Day 6...

...and we hit a snag. The new range is damaged and leaks, so we are awaiting a replacement and definitely not yet cooking with gas. However! The Professionals' job is complete. Yesterday they finished up a few electrical odds & ends and installed the cabinet hardware.


So, now we've got to get to work with paint, beadboard backsplash, shelf paper, and moving back in. Our plan had been to paint everything white. However, when I started that yesterday afternoon, it felt very stark. Not the first time I've changed my mind mid-paint job; going to have to give this some more thought.

Monday, July 11, 2011

Fun With an Extension Ladder: Fool's Errand

When we moved into The Ear, we noticed that our new house sported a case of architectural fungus that seems to infect a lot of residential buildings: a leftover satellite dish. When you sign up for this service, the company happily comes out and installs your dish. But when you cancel, they just come get the guts that make the thing work; they leave the ugly metal bits behind for someone else to deal with (unless, apparently, you pay them $200 to reclaim their property). We thought it would be pretty easy to take care of ours by hanging out our back window and getting the last bits with our new friend, Extension Ladder.

Here's Mr. MJ at work, hanging out the window (yes, I was hanging on to him):


Ah, success! Here's the big part, dismantled and hauled inside:


But ugh. What was left proved too much for us (didn't help that by the time we got to this part, the mid-afternoon sun was baking the back of our house). All the super strong bolts were too much for our tired hands and sweaty backs at this point. We'll try again, maybe with reinforcements.

Tuesday, April 5, 2011

Garden Update

Despite freezing temperatures and violent thunderstorms, our daffodils have arrived in force.


I found a nice little bird bath while antiquing out in Leesburg, VA.


Otherwise, all of Washington is covered with cherry blossom petals, as all the recent rain and wind have started to knock them off the trees.

Tuesday, February 15, 2011

Porch Projects: House Numbers

Things have been a little quiet around The Ear over the past month; more art than house sprucing has been happening lately (like this, for instance). However, today I accomplished something small but beautiful: I painted our house numbers in our front transom window, where they belong.

Here is what our front door and porch looked like this morning:


You can barely see the black metal house numbers to the left of the door, since they blend right in to the dirty brick. You can, however, see the taped up pieces of paper, with our address printed on them, in the transom window. I used one of these as a guide for painting my numbers.


I used gold and black paint pens for this project. The Capitol Hill Restoration Society says that numbers painted in transoms should be in gold, in a serif font, and have a black outline or shadow.


So, I taped my printed-out guide to the outside of the window and traced the numbers on the inside of the glass with my paint pens. In this image I am almost done with the work, but you can see the print out behind the paint.


Here's the front doorway now. Much nicer and easier to find, don't you think? Now I need to remove the old numbers. Add it to the list.


Thanks to fellow DC house blog Row House for the idea for this project! Until I ran across this post, I thought I was going to have to use ugly vinyl decals. The power of the Internet...

Tuesday, January 18, 2011

Entryway: All Back Together

Over the long weekend we finally got all our doo-dads put back where they belong, so we have a well appointed and organized front entry hall again.


I am still enjoying the way the gray paint we chose compliments both the yellow toned woodwork and the red exposed brick. I wasn't sure it would be possible to find a paint color that would do both. So, when in doubt, go with a neutral gray; it will probably look okay.


We are using my grandparents' old mailbox as a holder for wallets, phones, keys, and gloves. The double lamp with the eagle on top was theirs as well. I read somewhere that brass may be making a comeback for interior fittings. If so, I'm prepared.


Tuesday, December 21, 2010

Happy Christmas: Look, We Decorated

Welcome!


For me, Mr. MJ, and the Birdies:


Happy Holidays from our flock. Back with a painted entryway soon.

Thursday, December 2, 2010

Porch Projects: Sleeping Porches are Complete, Now With Window Shades

We had a lot of guests over the Thanksgiving holiday, so I had to get the windows of the sleeping porches covered in an attractive manner. Previously, these windows had been unattractively covered with cheap, dirty plastic mini blinds.


I found a project tutorial on the Internet about turning such cheap, dirty plastic mini blinds into lovely fabric shades, so I set to work.


After a whole day's work, I finished up with this:


Making these shades was not super easy, but I was able use materials I already had for a cheap fix to my problem. I may remake the shades in the future with some better fabric (I just used an old white sheet here), but for a temporary solution these shades work well. Thanks, Little Green Notebook, for the great project instructions!