Showing posts with label shopping. Show all posts

Tuesday, September 3, 2013

Porch Projects for Summer: A New & Improved Back Porch, now with Screens!

Adding the second bathroom is not the only improvement we've made to the Ear during this summer that just ended.  Over the course of a few months, by spending an afternoon here or a weekend there, we upgraded our back porch.  Now, instead of a dumping ground for empty boxes, recycling, and miscellaneous junk, it's now a nice place to sit.  We are really looking forward to evenings out there in a few weeks.

We began back in the spring, when we ripped up the nasty, deteriorated vinyl tile flooring to expose the original wooden porch floor (which, it turned out, was in pretty good shape).  This process was much, much, much, harder than anticipated due to a well-installed subfloor.  Someone really knew what they were doing there (unlike with so many of the other "improvements" that we have corrected).  I do not have photographic evidence.  Take my word for it that it was awful.  Once the stuff was gone, we put several coats of floor paint (same used in basement) on the old floorboards.

Next, I spent several weeks trying to repair the jalousie windows.  We have nine of these, each operated by a set of two crank mechanisms.  Fewer than half of these crank mechanisms were working when we bought the Ear.  I resolved to get as many functioning as possible.  Below, a properly working mechanism.  Note that all its hinges are connected with either screws or rivets.


On the non-working mechanisms, the screws or rivets were missing.  A commonly-not-there screw was the one my finger is pointing to in the picture below, that attaches the crank to the hinges that move the glass louvers.  It's a strange one to be missing, because you can only detach it if you removed the entire mechanism from the window.  Nevertheless, we lacked most of these.  I guess previous denizens of the Ear did not appreciate air flow? 


Slowly but surely, through sacrificing/cannibalizing a few mechanisms and multiple trips to hardware stores and salvage yards to dig through bins of old screws, I got all but four (of 18 total!) mechanisms working.  Now, only the windows on the sides of the porch don't work, and they wouldn't catch a breeze anyway.  To finish up this aspect of the porch, I gave every joint in each jalousie a good squirt of silicone lubricant.

Our next order of business in our quest for a nice porch was to buy and install screens to keep out the mosquitoes. Because of the presence of many old screen clips attached to the windows' metal frames, we knew there were previously screens on all the windows (you can see an old clip in the first photo).  After carefully measuring twice, we ordered nine new screens from Frager's Hardware, a Capitol Hill institution.  (Let me stop here and appreciate Frager's for a minute.  About two hours after these screens were delivered, Frager's went up in flames.  It was a huge, multi-engine fire that raged all night and totally gutted the building.  Our community has felt the loss ever since, as it's now much harder to find parts to fix our weird old houses ((and knowledgable people to help us find said parts)).  Frager's has a garden pop-up at Eastern Market and is continually adding back products it can offer while plans are made for rebuilding.  So if you are in the neighborhood, please shop there!)

Back to the screens.  These were somewhat difficult to install, as old, bent, non-working clips had to be removed, and new holes drilled for new clips.  And since each window is slightly different in size, etc., each screen required a slightly different installation strategy.  We got this done over a couple of weekends.  Here's Mr. MJ in action with the drill on the ladder:


Behind him you can see the new screens in place all around the porch.  We worked at night when the sun wasn't beaming directly into the space.  Also notice the blue porch ceiling, a quickie paint job I did with a quart of paint left over from another project.  I touched up a lot of the wood out here too.


After this point, our porch project was put on hold for about a month while the new bathroom in the basement was created.  The porch became a holding area for tools and other items that had to temporarily move out of the basement.

But after last weekend, we've finally got our porch back!  And maybe for the first time in a long time, it is an orderly, pleasant space.  I decorated it with furniture we already had, a yard sale table cloth, and a large sisal rug I got for free from the neighborhood listserv.


I first posted about this space back in May of 2010.  At that time, I deemed the back porch a longer-term project.  I had no idea that "longer term" would mean three years and change.  However, I think we can now call this one more-or-less done!

Thursday, December 29, 2011

Kitchen Conundrum: More Floor

I got a lot more of the old ceramic floor tile taken up today:


The only tiles left are those under the stove and refrigerator. Moving those ought to be fun.

Here's some other stuff we've procured:

A super beautiful faucet


A salvaged cast iron sink, barely used, from Craig's List (only $25!)

Kitchen Conundrum: Cabinets & Layout

Yesterday, this happened:


Our cabinets arrived (and our contractor and his crew are starting Monday!). But how did we get to this point? I'll back up to earlier in the fall...

I already posted photos from some recent open houses in our neighborhood that gave us some ideas about where to add storage to our kitchen: in the narrow area by the doorway to the front of the house, and behind the back door. But, both of these spots would require shallower-than-standard-depth base cabinets. Is this possible without going the custom route?

The answer is yes. Most special-order cabinet lines can be made this way, and Ikea also carries shallow-depth bases. We heard really positive things about Ikea kitchen cabinets, so we started there.

The great thing about Ikea is its transparency. You can use the online room planning tool from your home computer (for examples see the images below) to place the products where you want them. The program keeps track of exactly what you've selected and how much each layout would cost you. When you've got a layout you like, you can access your saved design at the store and a customer service rep will draw up your order. There's no mystery, no need to make an appointment, no cost-per-linear-foot prices that don't translate to the real world. You can window shop from home all you like.


So what's not to love? Like most Ikea products, these cabinets come flat packed. You, or someone you hire, has to assemble them before they are installed. I've put together a lot of Ikea furniture, so I knew I was capable. But the thought of all those boxes piled up in my living room made me tired. So, just to make an educated decision, we looked at other cabinet vendors, including the Despot, Lowes, and an online wholesaler (these require making an appointment and having someone else walk you through the layout process you may have already done at Ikea...a little slow and frustrating if you already know what you want, but them's the breaks of kitchen remodeling).

We discovered that mass market cabinets are mostly made by a handful of companies (despite being branded differently) that have a constantly rotating set of deals and incentives going to help move their products (free sink base with order! free finish upgrade with order! free sink with countertop order!). Ikea, on the other hand, relies on your labor to keep costs low.

Ultimately, because of a combination of manufacturer and store discounts, we placed an order for American Woodmark cabinets from Home Depot. The price was good, and the kitchen designer we worked with (as opposed to some of the others we encountered) actually listened to our ideas instead of telling us why they wouldn't work. Also, he did not try to upsell or rush us. Our order was only about $400 more than our Ikea design, and I thought $400 was a good trade for not having a mountain of boxes staring me down with only an allen wrench to scale it with.

What we ordered: American Woodmark cabinets with Reading doors (these are wood, Shaker-style), Maple Linen finish (a white painted finish, one of those freebie add-ons that ordinarily would have cost $600 or more) with brown-black knobs and drawer pulls (another freebie). Yes, the boxes of these cabinets are MDF. But so are Ikea cabinets, and so are the 20+-year-old cabinets we're in the process of deinstalling. I'm not too worried.

Edited to add: Originally, we were interested in using salvaged cabinets. Doing so can be more eco friendly and wallet friendly than new stuff. But, we quickly realized that because of our small space, exacting dimensions, and lack of expert carpentry skills, this probably wasn't the best choice for this project. I think if you have a more open or flexible plan, salvaged cabinets can be a great way to go (if you can wait patiently for the right set to come along).

Wednesday, May 11, 2011

OMG, CRAZIEST project EVER (so far): Part 1

Some of you may be familiar with this paragon of beauty:


For those who haven't been playing along at home, I'll fill you in. This is the light fixture that was in our foyer/entryway when we bought The Ear. Its 70's-80's, Western-lodge aesthetics, plus missing glass globes and glare-y light weren't really doing it for us. When we moved in last April, I felt sure that its days were numbered. However, I totally underestimated my ability to become focused on other projects and overestimated my ability to be decisive about purchasing a new fixture. So a year later, this "chandelier" is still with us.

Until recently, that is. A few weeks ago Mr. MJ and I were up in Baltimore for some art shows, and we stopped into Second Chance salvage superstore on a whim. We found these lovely ceiling fixtures by Rejuvenation (normally beyond the budget) on super sale, and I got to work coating their brushed brass bases with my trusty Rustoleum paint (saver of ceiling fans, plastic switch plates, etc. etc.).


My willingness to wait for the right thing at the right price paid off...a year later. So where is the craziness, you may be wondering? Well, ask and it shall be given, starting with Part 2.

Friday, September 24, 2010

Ballad of the One Bathroom: Let There Be Toilet Paper

I finally installed our sale-aisle-at-Restoration-Hardware goodies:


These are from RH's Bistro line of bathroom hardware. We waited for a sale, then snapped them up.

When we moved in, our one little bathroom had no towel bars, no hooks, no toilet paper holder. Just one measly little peg that did a better job of letting our hand towel slide into the trash can than holding it in place for easy use. We had to keep our towels on over-the-door racks in the hall. And the toilet paper just kind of floated around the bathroom for the next person to hunt for in a moment of need. Now everything has a home, and with style. It's starting to look like a real bathroom in here.

Monday, September 20, 2010

Porch Projects: Objects to Paint

Here are a couple of other painting projects I've been working on on-and-off:


In the foreground are outlet covers and switch plates that I bought for super cheap ($0.10 each) at the salvage. They are just plain plastic, so to dress them up I'm painting them with the same oil-rubbed bronze Rustoleum I used for the ceiling fan makeover. A lot of ou covers are either missing or ugly, so this is my inexpensive fix.

In the background are our future medicine cabinets. These are also salvage finds; at $5 each, they were far cheaper than buying new ones (identical new ones would cost $60 each). However, they were in pretty sad shape, so I've been gluing, priming, and painting these as well. Ultimately, I think they will look better than newly bought ones, because the paint color will coordinate with the rest of the bathroom.

I guess the moral of this story is that cheap often takes work, but sometimes it's so worth it.

Monday, September 13, 2010

Saturday Salvage

This past Saturday we finally took the old sink to the Community Forklift salvage yard. A woman exiting the store when we arrived with it thought it was cute. Ha!


We replaced the sink with a box of old doorknob sets. They were half price, so it was hard to resist.


One of these days we'll get to this project...

Monday, July 19, 2010

Home Office, Now With Furniture

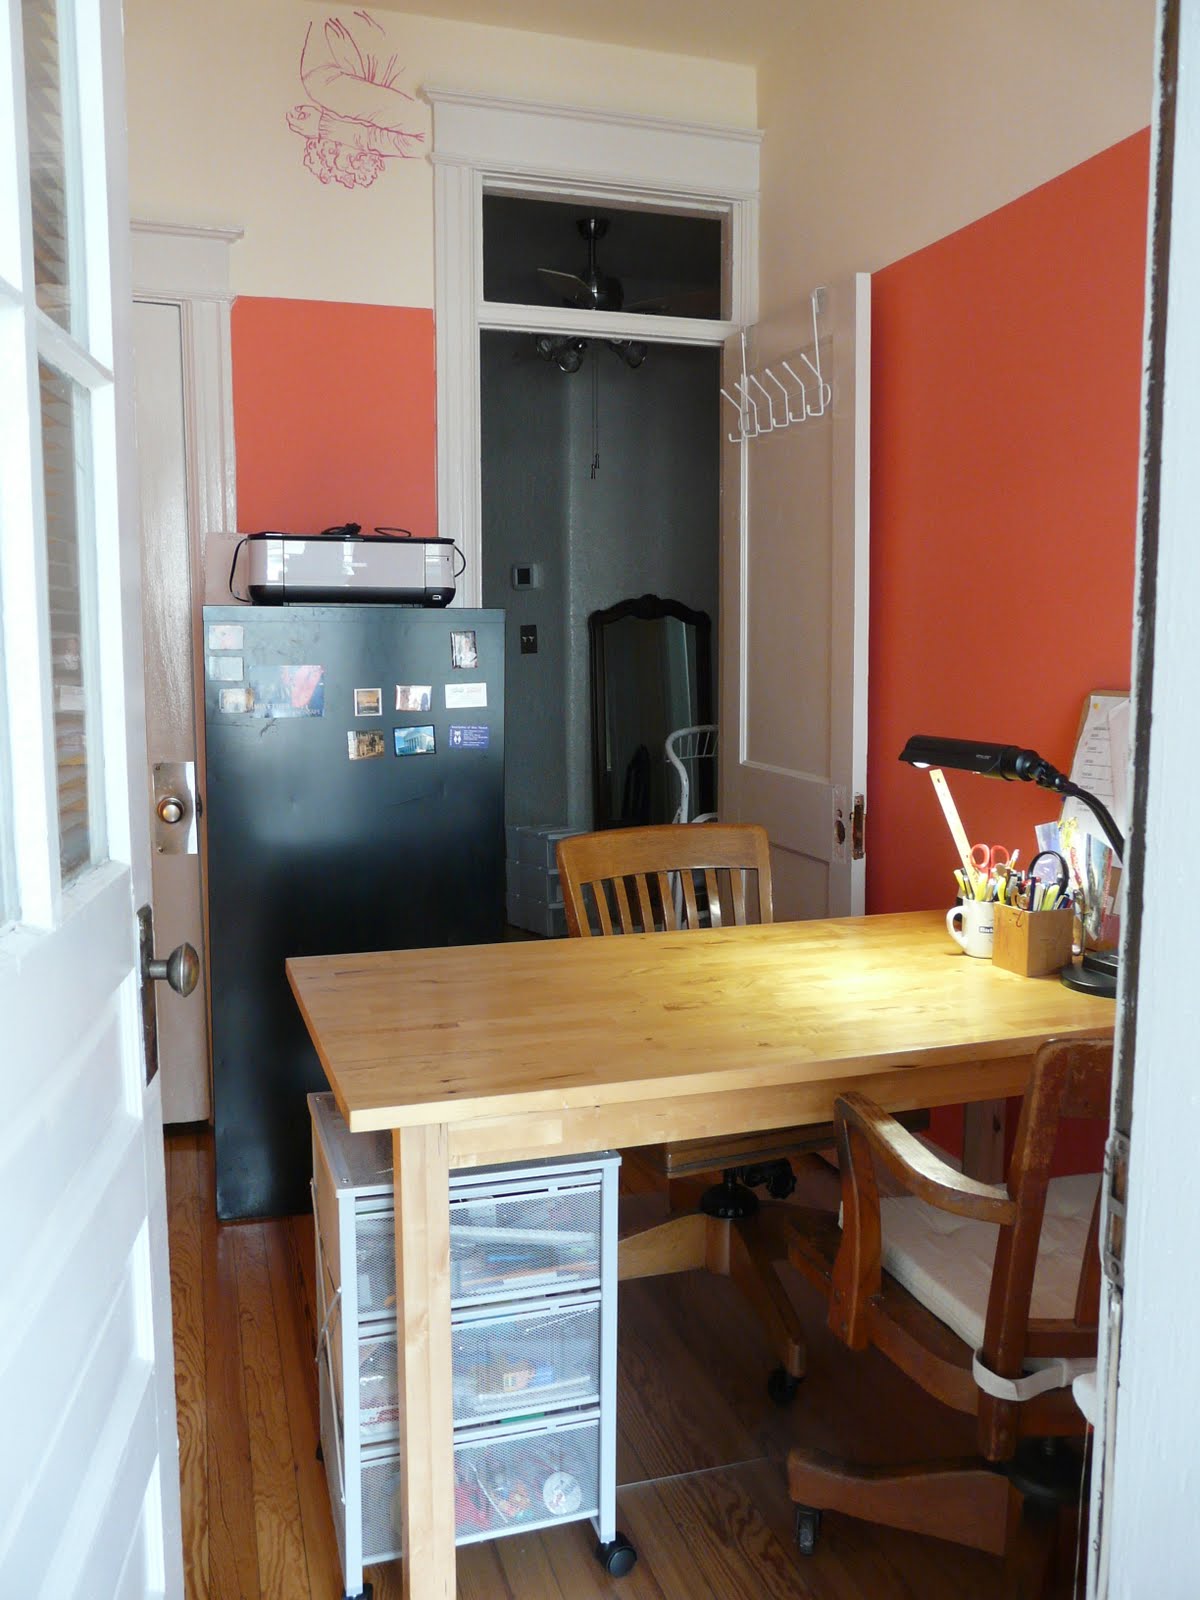
Last weekend's project was moving all the furniture and other misc. stuff back into the tiny bedroom, turning it into a useable home office.


We are going to try sharing a desk since we both have laptops which mostly living on the dining room table anyway. This final phase of Project Office would not have been complete without a trip to Ikea (for the unfortunately named Kolon toothless chair mat and the helpfully named Andy rolling drawing cart). We made the mistake of thinking it would be un-busy on a rainy Saturday afternoon. How wrong we were...oh well, let the work commence.

Wednesday, May 5, 2010

Getting There...

This weekend we made some progress on the entryway. After some antiquing outside Leesburg (this place has great stuff and prices) and some Craig's List shopping, we've got a mirror to check our teeth for food bits before we leave and a coat tree to dump our coats and bags on when we arrive back home.


Also note my granny's old sewing machine serving as a catch-all table and the little chest (made by my granddad for my grandmother's vacuum cleaner) serving as a place to take off and store shoes. Now if we could just do something about that light fixture, we'd be in business.

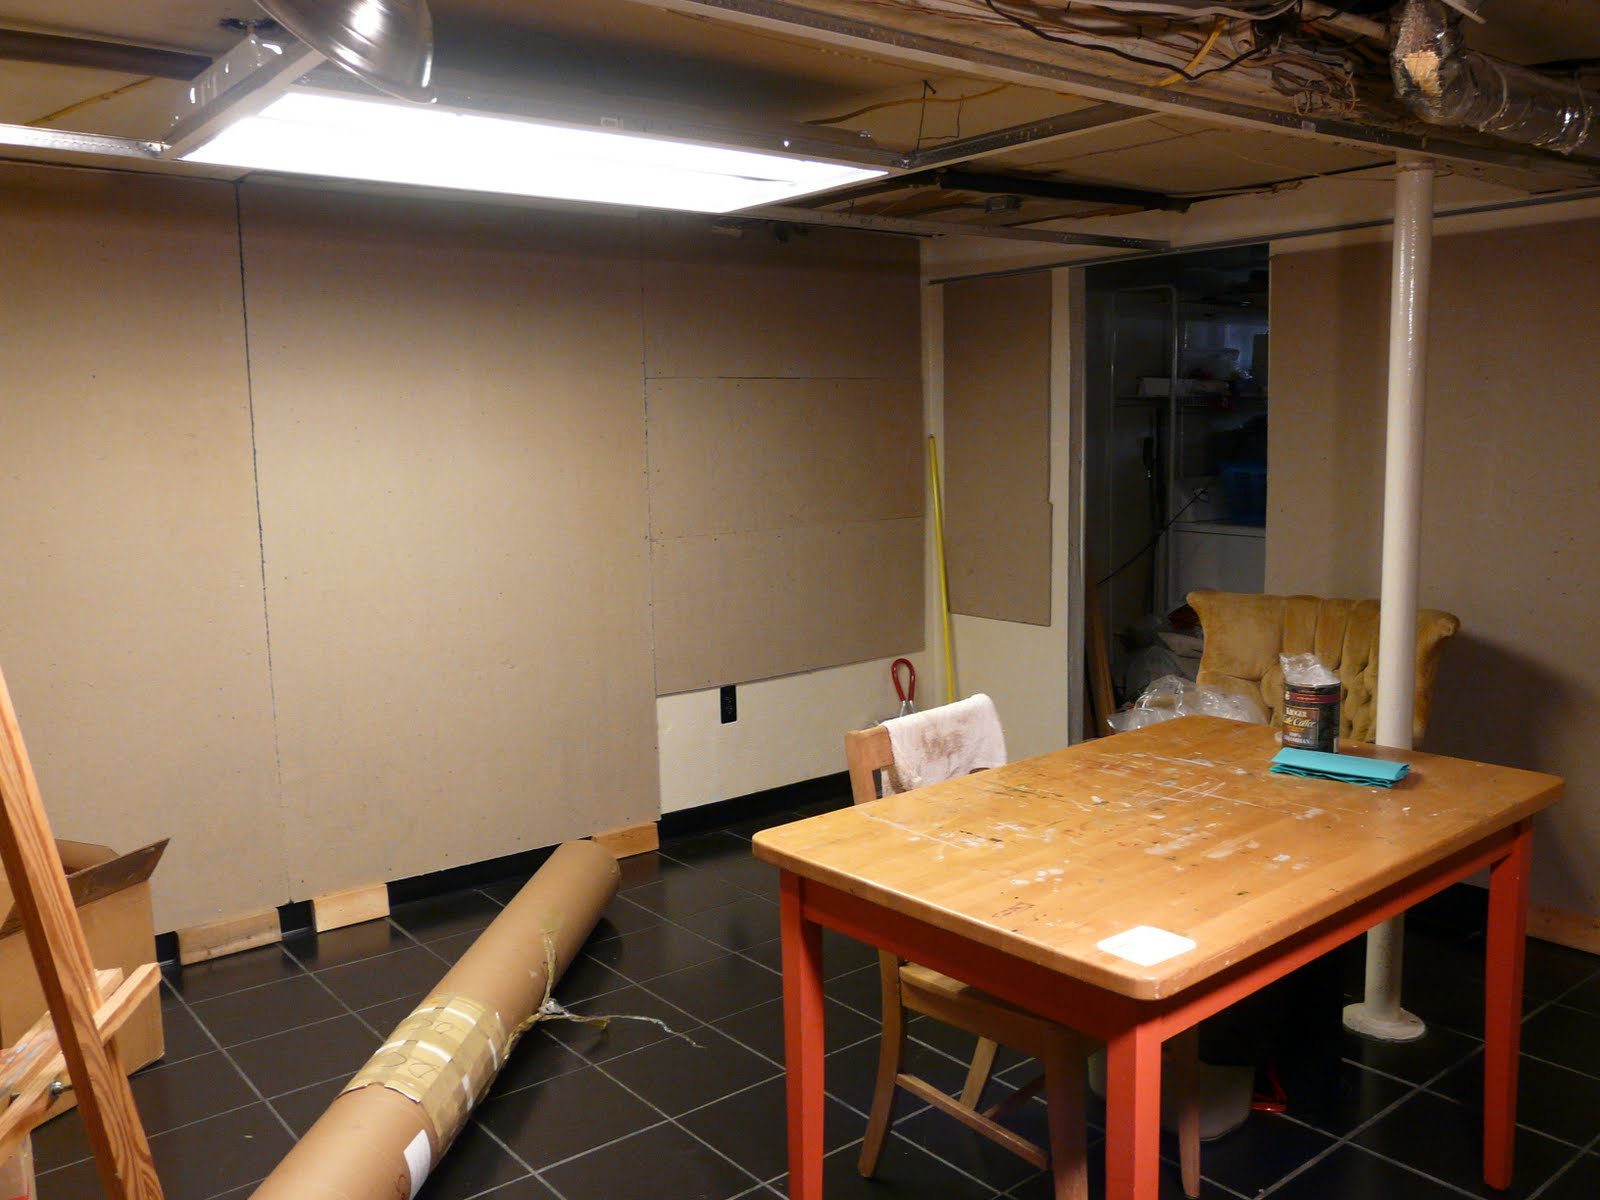
We also broke out the circular saw and made some headway in the studio. We lined the walls with homosote, which is usually used as a sound proofing and insulation material. For an artist, it makes a nice smooth, soft surface to take up drawings and paintings while I work. Today I'm cleaning up and painting. Almost in business down there too.