Showing posts with label tiny bedroom. Show all posts

Monday, November 11, 2013

Tiny Nursery: Ready & Waiting

Once the main components of the nursery were in place, I was gradually able to organize and decorate the space.  I've used a combination of Craig's List purchases (the red chest of drawers), Ikea items (crib, shelves, curtain wire), hand-me-downs and neighborhood listserv finds (most of the clothes, a few toys), and quite a few things from my own childhood (crib quilt, many toys, odds and ends) to pull this little room together.


I hung a couple of my own paintings and moved my great grandmother's rocker into the room.


Closet full of little clothes.

The chest is stocked with diapers and covers (thank you, Modern Diaper Service early delivery!), socks and hats, bedding and blankets, with a changing area on top.

Some of my childhood toys, all well loved and well remembered.

 Other items I'm excited about:

Moses basket, found on the neighborhood listserv, for portable sleeping.

Beautiful receiving blanket knitted by Mr. MJ's mother.

Two paintings on paper by my friend Mike Dowley, to hang above the crib.  Need to get these framed!

There are still one or two things this little room lacks, like a lamp and a mobile, but they will arrive from Little Rock sooner or later.  For now, the nursery is ready and waiting for Baby MJ!

Thursday, November 7, 2013

Tiny Nursery: Potato Print Curtains!

The windows in the tiny nursery are tricky, since they are very tall and include both a window and a functioning door that leads onto the sleeping porches (and the new office-ette).  I determined that the best looking way to cover them would be to run a curtain along the whole wall.  But after weeks of Internet and in-person shopping, I hadn't found Exactly What I Was Looking For, and the time to hang them was nigh.  In a fit of pique (and energy!) I decided to make my own curtains from canvas drop cloths and paint.

I first bought two large canvas drop cloths, then washed and dried them in case they had any kind of sizing or other treatment on them.  I next carved some simple triangles into three potato halves, using regular kitchen knives and a couple of chisels.

Potato stamps!
I wanted a simple pattern that would be forgiving of mistakes and variations, and easy to cover a large surface with.  I decided to use the same paint for both curtains and wall to keep the scheme in the nursery streamlined and not too busy.

Potato stamps and Benjamin Moore Natura paint, to be used for both curtains and walls.

Before working on my drop cloths, I tested out some printing methods on scrap fabric.  I poured a small  amount of paint into a roller try, donned some rubber gloves, and experimented with brushing on the paint vs dipping directly into it.  I needed to figure out how much paint was sufficient to get a good print, and how much would just turn into a blob.


After figuring out a strategy, I stretched my first drop cloth onto one of the big painting walls in my studio.


And I started to print!


After several hours of work, I produced this thing of beauty:

One finished curtain
Each curtain took me about a day to fully print, including breaks to do other things and rest my hands.  I learned the hard way not to just leave my potatoes in the tray with my paint: rotting will occur, oozy grossness will ensue!  If you try this at home, and your project takes more than a day, wrap up your potatoes and stick them in the fridge!

Finished product, in place.  Those happy smiles are worth my couple hours of oozy grossness.


Wednesday, November 6, 2013

Tiny Nursery: Closet Makeover

When we moved into The Ear, we had two small, crappy closets.  One was in our bedroom (improved upon last year), and the other was in our office-turned-nursery.  Both closets were used to run HVAC ducts, which is good for aesthetics but not for storage capacity.  

The nursery closet was a bit better off than our bedroom closet.  It had a couple of Home Depot supplied Closet Maid brand shelves, which, although they were hung ridiculously high, would hold some stuff; the bottom one sported a rod.  And much like with our bed room closet, we filled this space up with coats and luggage as soon as we moved in then focused on to other things, leaving its hole-y, unpainted walls and general dirtiness to fester.

At some point over the summer (maybe during the bathroom addition?), I realized that I needed to tackle this area sooner rather than later while I could still fit in there and turn around.  So I gave the space a good cleaning, patched all the holes and cracks, and tried out some leftover paint colors:


I decided on this unidentified yellow; the green was a little too bright and cheerful.

Better already!
I bought materials to hang two more shelves and two more rods.  As I mentioned earlier, the closet had been outfitted with Closet Maid wire shelves, so I stuck with that brand for uniformity and ease of acquisition.  I was not terribly happy with the hardware and installation process of this system, however.  It's really designed for modern 2x4 framed construction, not old lathe-and-plaster of unknown structure.  Hanging the new shelves took far longer, and far more patching compound, than anticipated.

Mistakes being made & fixed.
 Eventually, I got the new shelves installed and commenced shoving all the baby stuff we had been collecting from neighbors and family members and garage sales in there.

Disorganization!
Eventually, we got everything sorted, washed, and hung in its proper place.  We removed the closet door to save on space, hung some little hooks, and I made a curtain to match the others.  I wish my clothes closet looked this cute and happy!


Tuesday, November 5, 2013

Tiny Nursery, Part 1

About a month ago, Ma MJ came to town to help turn the former tiny office into a tiny nursery (Baby MJ is supposed to arrive just before Thanksgiving).  We painted, hung curtains, put together a crib, and generally got things in order.  It was a warm end to September here, so all our windows were open, our back porch was in use for relaxing, and lots of work got done.

Before Ma MJ arrived, we had to choose a paint color to replace the vivid coral (I loved this coral, and hope to use it again, but I didn't think it was restful enough for a bedroom).  We decided to use Benjamin Moore Natura, a VOC-free paint.  We narrowed our color choices to a couple of medium-dark blue-grays.  We chose the color on the right, Pike's Peak Gray, because of the way in complemented both the trim paint and ceiling/upper wall paint that was already present.


Once Ma MJ was here, we taped off the coral area, and then we primed.  Next, we primed some more.


After several coats of primer, we got to the new color.  The BM paint is lovely, goes on well, covers well, no smell, and is worth the $$.  Really nice to work with.  After two coats of Natura, here is our new Pike's Peak Gray room (upper wall and ceiling are still Behr Linen White).


The tiny nursery's tiny closet.  More on this space later.

I created some potato print curtains for the room (stay tuned for separate post), which we planned to hang along the length of the back wall.  This seemed to me to be the best way to deal with the variety of surfaces and openings here.  We used the Ikea Dignitet tension wire hardware to span the space.

Mr MJ making it look easy.  In reality, he was drilling into brick; the whole process took far longer than anticipated.

Two + hours later: not simple or easy, as it turned out, but worth it!

The next afternoon, Mr & Ma MJ assembled the crib (the ubiquitous Ikea Gulliver).  I minded the tools, sorted the hardware, and occasionally provided a 5th or 6th hand.


With the addition of a refurbished chest of drawers from Craig's List and a rag rug we already had, plus our week of work, we had a functional room!  It was still in need of finishing touches, one or two cute doodads, and maybe some artwork, but we knew if Baby MJ arrived early he would have a place to land.  Thanks Mom! (again)


Wednesday, October 2, 2013

Garden's Ready for Fall, and Upcoming Large Project(s)

The garden is ready for fall: old things cleaned out, seeds planted, cat barriers (just some plastic mesh and bamboo stakes) installed.  Refrigerator pickles made with carrots and turnips.  Beans, tomatoes, peppers, and eggplants still going strong!


HOT! Thai chilies

Japanese eggplant

New mustard seedlings

Verdant pole bean vines against the brilliant sky

A rather large bean ready to be picked
But inquiring minds want to know:  what's going on inside the house?  Didn't that sunny coral colored room used to be a home office?  Why does it look like such a wreck?

New paint samples to contemplate

If you guessed baby, you guessed right!  The tiny little office is becoming a tiny little nursery.  Stay tuned for its transformation.

Future nursery's closet full of hand-me-downs and garage sale finds

Monday, July 19, 2010

Home Office, Now With Furniture

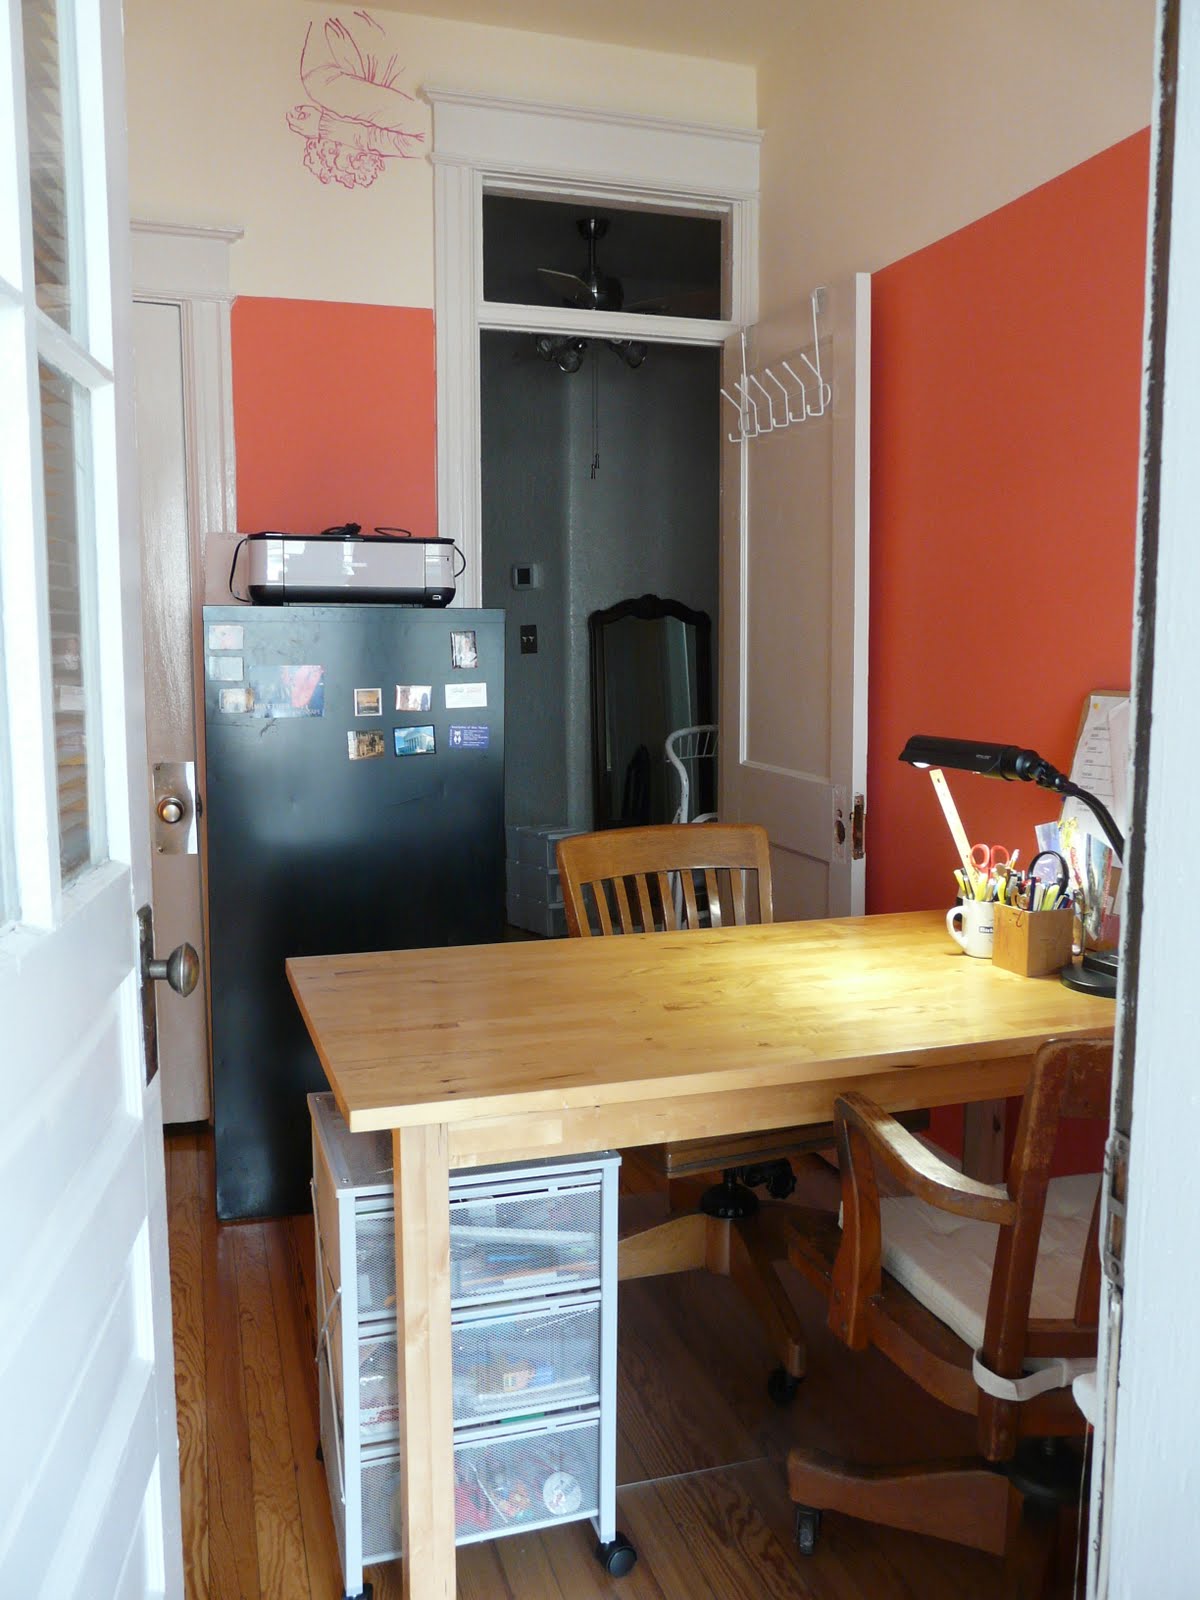
Last weekend's project was moving all the furniture and other misc. stuff back into the tiny bedroom, turning it into a useable home office.


We are going to try sharing a desk since we both have laptops which mostly living on the dining room table anyway. This final phase of Project Office would not have been complete without a trip to Ikea (for the unfortunately named Kolon toothless chair mat and the helpfully named Andy rolling drawing cart). We made the mistake of thinking it would be un-busy on a rainy Saturday afternoon. How wrong we were...oh well, let the work commence.

Thursday, July 1, 2010

Office Details 2

After letting the wall paint dry and removing the painter's tape, I set to work on some small wall drawings/murals of me and Mr. MJ. For this project, I used my overhead projector, a couple of transparencies.....


some acrylic paints, small brushes, and some little paint dish/jar lid things to hold a small amount of paint while I was working.


To get the image onto the transparency, I taped it to my computer screen and traced a digital photo onto it using a permanent marker. This has often been my quick-and-dirty method for enlarging drawings or photos in art making, and it works well here too.


The biggest problem I faced was getting the image projected onto the wall like I wanted it. This arrangement is probably not one the overhead project or ladder folks would recommend...but here I am using it anyway.


My mom thought that I had portrayed us doing some yoga asanas to create a sense of calm in the room. Even though that's not at all what we were doing in my source photos, it's still a nice thought. Namaste!

Office Details 1

Here's a few more details about the paint job I recently completed in the tiny back bedroom. The whole thing came together with the magic of painter's tape and an overhead projector.

I was inspired to do a two-tone paint job by a recent post on Apartment Therapy. We knew we wanted a bright, energizing color in this room so that we will look forward to hanging out in here, paying bills and burning the midnight oil if necessary; however, because of the room's small size I felt like I needed a way to leaven the impact of the color so it didn't feel overwhelming. I decided to paint the ceiling and top part of the walls in a light color, and go for a bright coral underneath.

First, of course, we taped off the trim and put down a coat of primer (I should probably buy stock in the Kilz company). Next, I painted the ceiling and a few feet down the wall with Behr's Linen White (two coats!). I didn't measure, but I had an approximate idea of where the wall would transition from white to coral.


Next, I went around the room with a long tape measure, pencil, and level, marking out a line for the border between white and coral. I realized it was really important to take my time with this step: I measured from the floor up the wall to a given point (I think it was around 80 inches), making a mark with my pencil about every 10-12 inches. I then used my level to realign these marks into a horizonatal line, since the floor in our old old house is not perfectly even (shocking!). Next, I connected the spaces between each mark with blue painter's tape, being careful to let the pieces overlap and to firmly press them down to the wall. I was also careful to place the tape so that its bottom edge would form the top line of the coral paint.


Then I painted, this time with Behr's Cool Lava. Then I painted again.


Check out how the Cool Lava makes the room glow in the afternoons. Fancy!

Sunday, June 27, 2010

Inquiring Minds Want to Know...

So here's a mini post with an office reveal...

Tah Dah!


We chose two colors, both by Behr: Linen White on the ceiling and top, with Cool Lava on the bottom. Also a little mural action with acrylic paint by Liquitex. I'll post more later about the processes I used here.